You transfer your entire WordPress site – posts, pages, themes, plugins – in under 30 minutes, for free. I did it with a 400MB blog using the All-in-One WP Migration plugin, trusted by over 60 million sites (think NASA and Boeing). No coding, no headaches, just a few clicks.
In this guide, I’ll Walk you through migrating your WordPress site using the free All-in-One WP Migration plugin, share tips for its paid extensions, and detail three alternative free methods.
Plus, I’ll show you how to update nameservers, IP addresses, and Cloudflare DNS with screenshots to make it crystal clear. Ready to migrate like a pro?
Let’s dive in!
Boost your WordPress skills with our expert guide!
Why All-in-One WP Migration is a Game-Changer?
All-in-One WP Migration is your ticket to stress-free WordPress migration, whether you’re switching hosts, changing domains, or going from local to live. Here’s why it rocks:
- Free Version: Migrates sites up to 512MB with a drag-and-drop interface.
- Paid Extensions: Handle unlimited site sizes, multisite setups, and cloud storage (Google Drive, Dropbox).
- Universal Fit: Works with any host – SiteGround, Bluehost, you name it.
- Zero Downtime: Your site stays live during the move.
- Trusted Globally: 60M+ installations, used by brands like NASA (ServMask data).
The catch? The free version has a 512MB limit. For bigger sites, paid extensions (like Unlimited Extension, $69) are needed. Some source these from third-party sites for free, but I recommend using them legally and deleting them post-migration to avoid security risks or conflicts.
How to Migrate WordPress with All-in-One WP Migration (Free Version)
This is the easiest way to move a WordPress site, period. If your site is under 512MB, follow these steps with visuals to nail it.
Step 1: Install the Plugin on Your Source Site
Head to your source WordPress site (the one you’re moving).
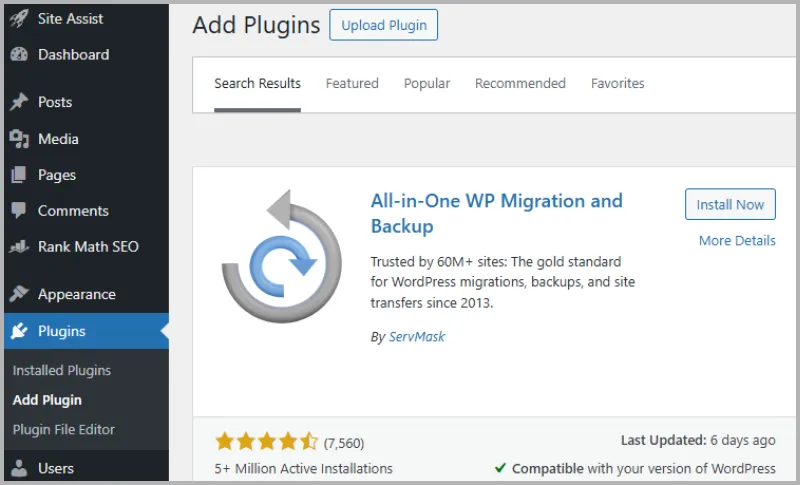
- Go to Plugins > Add New.
- Search for “All-in-One WP Migration.”
- Click Install Now, then Activate.
- Find the plugin in the sidebar under All-in-One WP Migration.
Pro Tip: Back up your site with UpdraftPlus before starting.
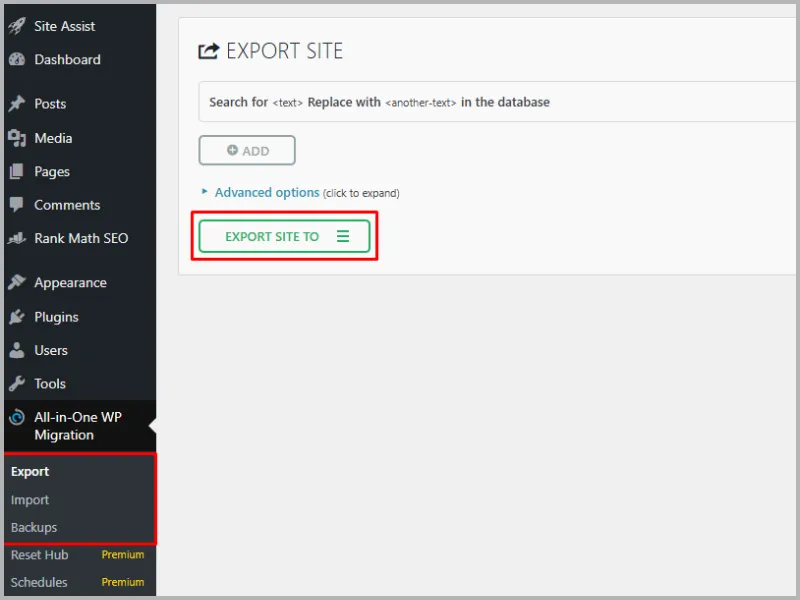
Step 2: Export Your WordPress Site
Time to package your site.
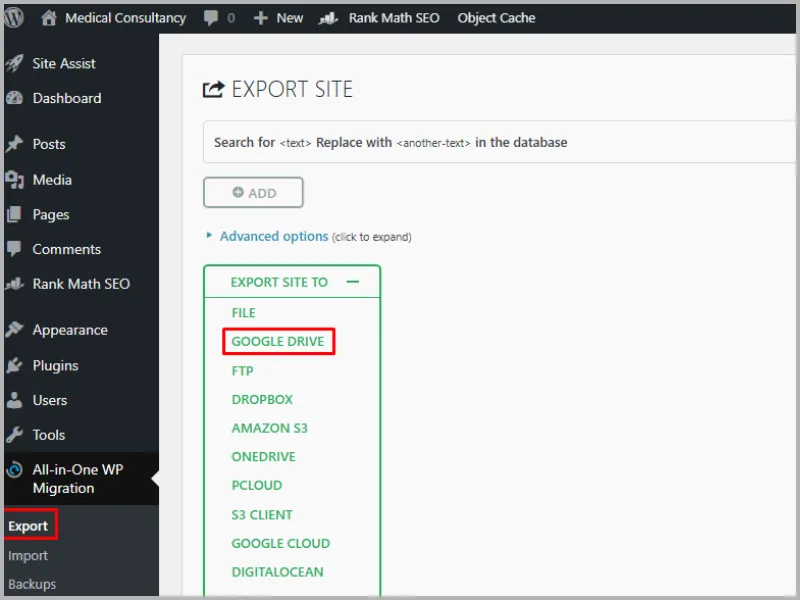
- Navigate to All-in-One WP Migration > Export.
- Select Export To > File (free option).
- The plugin creates a .wpress file with your database, media, plugins, and themes.
- Download the .wpress file (also saved in Backups).
Expect 2-5 minutes for a 400MB site, depending on your server.
Step 3: Prepare the Destination Site
Your new host needs a fresh WordPress install.
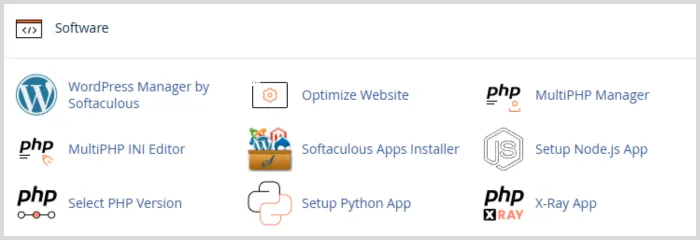
- Log in to your new host’s cPanel or dashboard.
- Install WordPress (most hosts offer one-click installs).
- Install and activate All-in-One WP Migration on the destination site.
Step 4: Update Nameservers, IP Address, or Cloudflare DNS
This step is critical to access your dashboard and site.
If Using Registrar Nameservers:
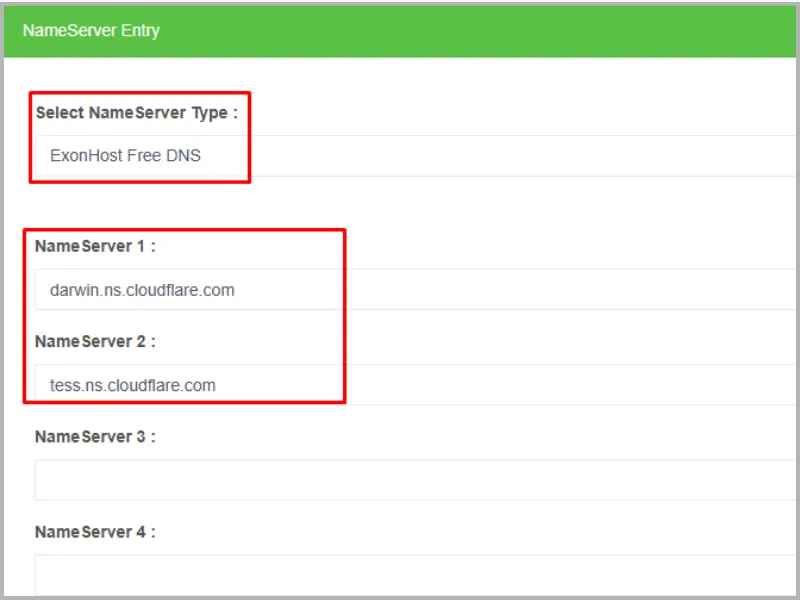
- Log in to your domain registrar (e.g., Namecheap, GoDaddy).
- Go to Domain Settings or DNS Management.
- Update nameservers to your new host’s (e.g., ns1.siteground.net, ns2.siteground.net, found in cPanel or welcome email).
- Alternatively, update the A Record to the new host’s IP address (from cPanel).
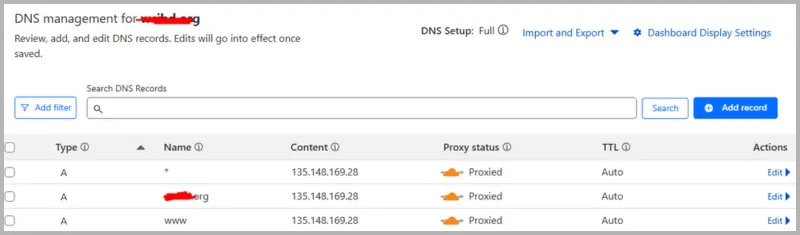
If Using Cloudflare DNS:
- Log in to Cloudflare.com.
- Go to DNS > Records.
- Edit the A Record: 01. Name: Set to @ (root domain) or www (subdomain). 02. Content: Enter the new host’s IP address (from cPanel). 03. Proxy Status: Set to “DNS Only” (orange cloud off) during migration to avoid caching issues. 04. TTL: Set to “Auto” for faster propagation.
- Save changes.
- Propagation: Nameserver or A Record change take 24-48 hours (check with WhatsMyDNS.net).
Warning: Skip this, and your site or dashboard won’t load.
Step 5: Import Your Site
Now, move your site to its new home.
- On the destination site, go to All-in-One WP Migration > Import.
- Click Import From > File and upload the .wpress file.
- Warning: Importing overwrites the destination site’s content. Back up if needed.
- Click Proceed to import.
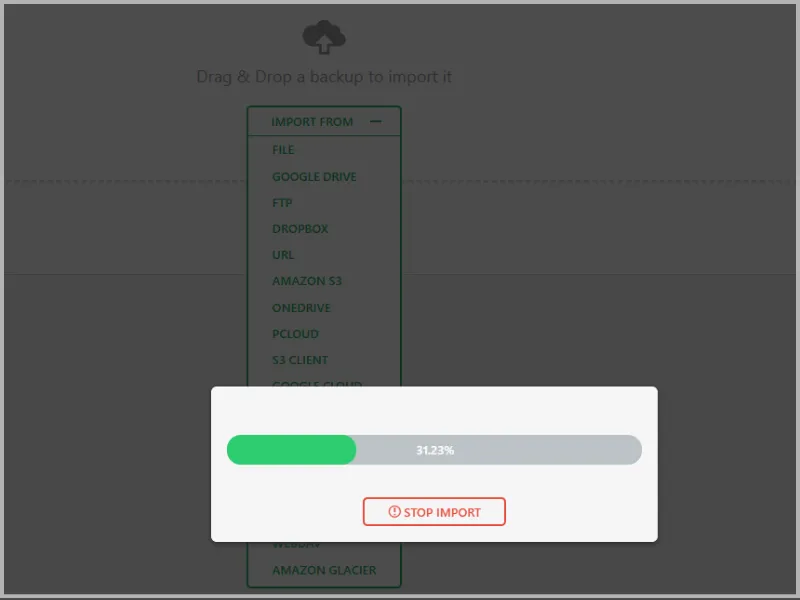
Takes 5-10 minutes for a 400MB site.
Step 6: Finalize and Test
Almost done!
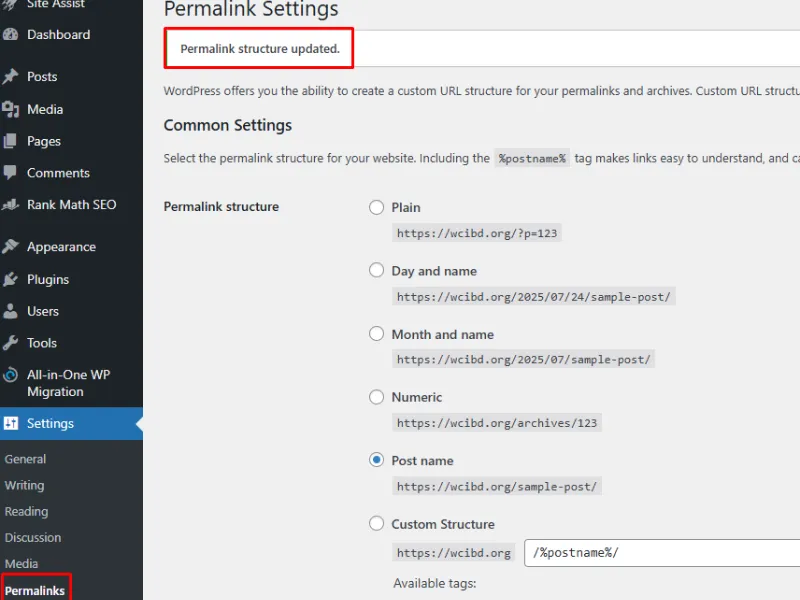
- Go to Settings > Permalinks and click Save Changes.
- Test pages, posts, images, and plugins.
- Delete All-in-One WP Migration from both sites for security and performance.
- Submit your sitemap to Google Search Console (like your article’s “Refresh Your Sitemap”).
Troubleshooting
- Upload Limit Error: Increase PHP upload limits in cPanel (ServMask guide:).
- Site Not Loading: Verify nameservers or Cloudflare A Record; check propagation.
- Encoding Issues: Ensure both sites use UTF-8.
Migrating with Paid All in One Unlimited Extensions for Larger Sites
Got a site over 512MB or a multisite? Paid extensions make it effortless.
Why Paid Extensions?
- Unlimited Extension (~$69): Removes the 512MB cap.
- Multisite Extension (~$319): Migrates multisite networks.
- Cloud Storage Extensions (~$99): Export/import to Google Drive, Dropbox, etc.
Buy from ServMask.com for support. Some source them free from third-party sites, but use legally and delete post-migration.
How It Works?
- Install the all in one unlimited extension on both sites.
- For cloud storage: Export to Google Drive, then import directly.
- For multisets: Select subsites or the whole network.
- Delete the plugin and extensions post-migration.
Cuts migration time for 1GB+ sites to ~15 minutes.
3 Alternative Free Methods for WordPress Migration
Not sold on All-in-One WP Migration? Here are three detailed free alternatives with visuals.
Method 1: Manual Migration with FTP and phpMyAdmin
The DIY approach – free but technical.
Step 1: Back Up Your Site
- Files: Use FileZilla to download the WordPress folder, especially wp-content.
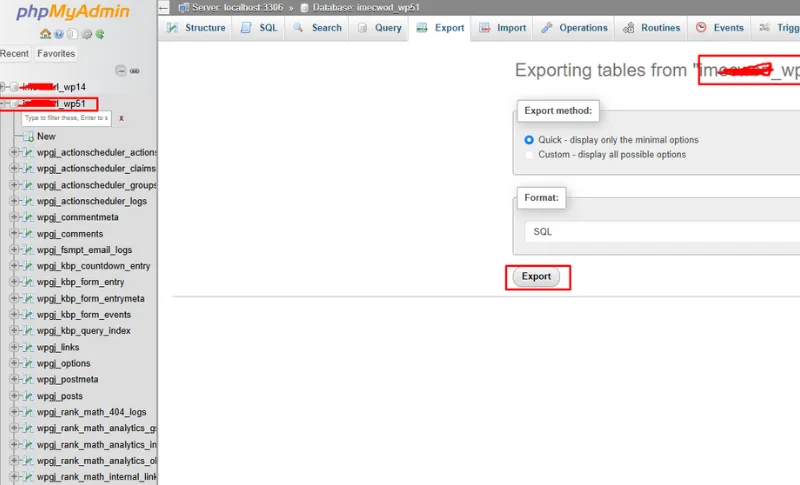
- Database: In cPanel > phpMyAdmin, select your database, click Export, and save the .sql file.

Step 2: Update Nameservers or Cloudflare DNS
- Registrar: Update nameservers (e.g., ns1.bluehost.com) or A Record in DNS Management.
- Cloudflare: Edit A Record in DNS > Records: 01. Name: @ or www. 02. Content: New host’s IP. 03. Proxy Status: “DNS Only”. 04. TTL: “Auto”.
- Wait 24-48 hours for propagation.
Step 3: Upload Files
- Install WordPress on the new host.
- Upload files to /public_html via FileZilla (permissions: 755 for folders, 644 for files).
Step 4: Import Database
- Create a database and user in cPanel > MySQL Databases.
- In phpMyAdmin, select the database, click Import, and upload the .sql file.
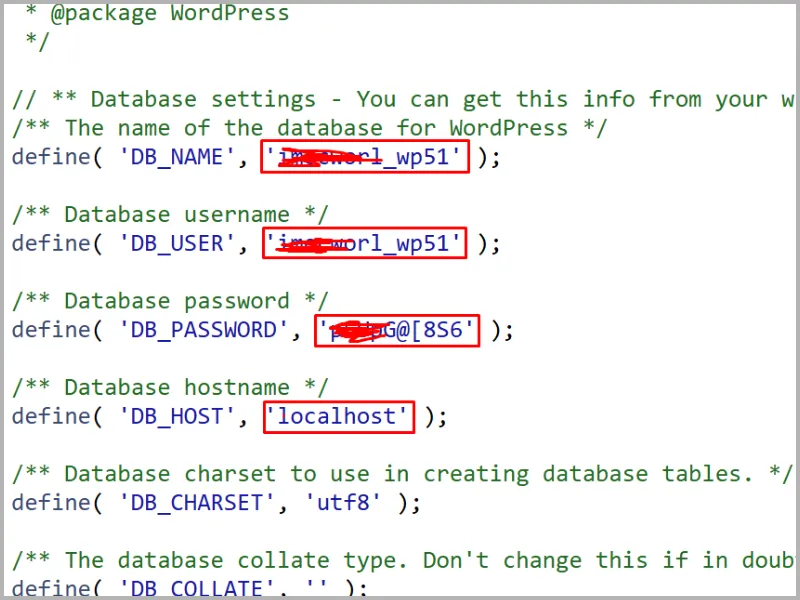
Step 5: Update wp-config.php
- Edit /wp-config.php with the new database name, user, password, and host.
- Save and upload.
Step 6: Test and Finalize
- Check the site for errors.
- Reset permalinks: Settings > Permalinks > Save Changes.
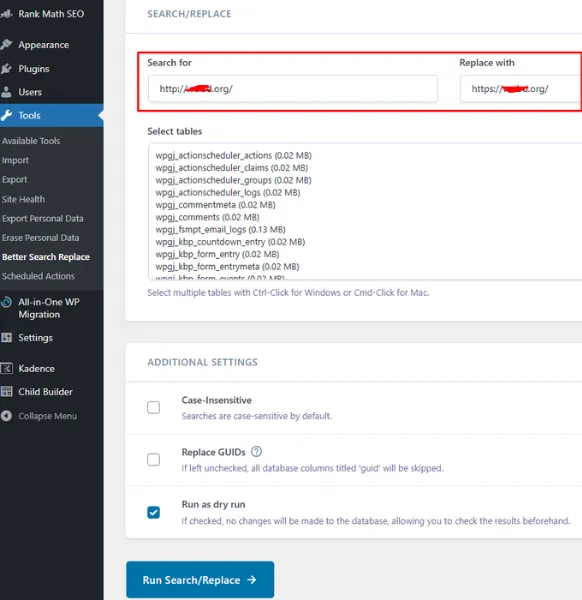
- Update URLs with Better Search Replace if changing domains.
- Set up 301 redirects (like your article’s “Redirect Old URLs”).
Pros: Free, no size limits, full control.
Cons: 30-60 minutes, technical.
Best For: Tech-savvy users.
Method 2: Migrate Guru Plugin
Migrate Guru handles up to 200GB using BlogVault servers.
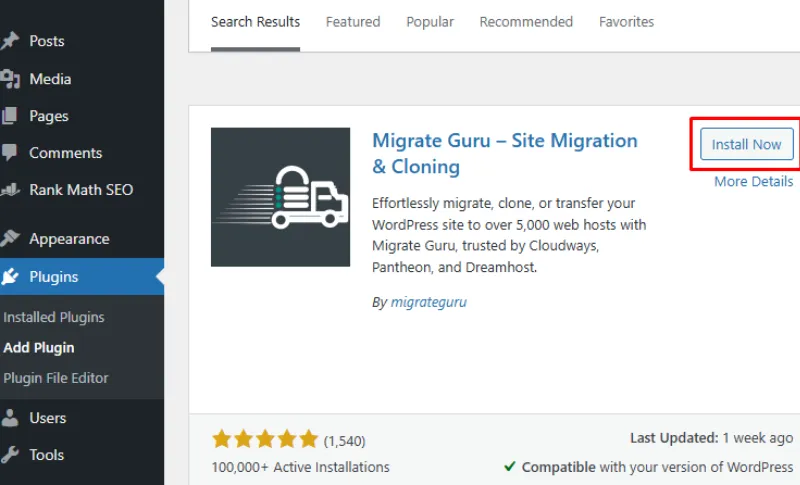
Step 1: Install Migrate Guru
- Install and activate “Migrate Guru” on the source site via Plugins > Add New.
- Optional: Install on the destination site.
Step 2: Update Nameservers or Cloudflare DNS
- Registrar: Update nameservers or A Record.
- Cloudflare: Edit A Record: 01. Name: @ or www. 02. Content: New host’s IP. 03. Proxy Status: “DNS Only”. 04. TTL: “Auto”.
- Wait 24-48 hours.
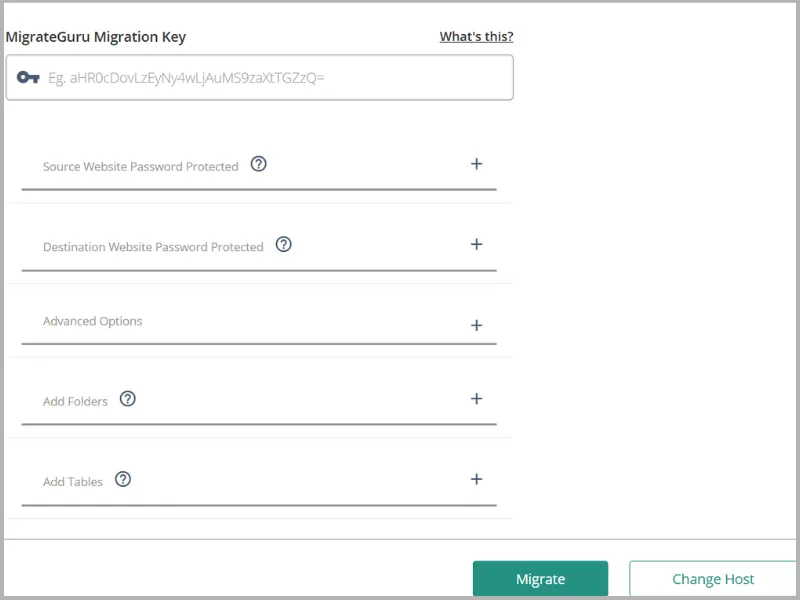
Step 3: Start Migration
- In Migrate Guru, enter destination host details (FTP, cPanel, or WordPress credentials).
- Select your host for auto-filled settings.
- Click Migrate.

Step 4: Finalize and Test
- Migration takes ~20 minutes for 1GB.
- Test pages, plugins, and media.
- Reset permalinks.
- Delete Migrate Guru from both sites.
Step 5: SEO Check
- Submit sitemap to Google Search Console.
- Check for 404s and set up 301 redirects.
Pros: Free, handles large sites, easy.
Cons: Limited multisite support.
Best For: Beginners or large sites.
Method 3: Host-Provided Migration Tools
Many hosts offer free migration tools.
Step 1: Check Host Tools
- Check your new host’s dashboard for tools like SiteGround Migrator or Bluehost’s WP Migration.
- Contact support for free migration (often within 30 days).
Step 2: Update Nameservers or Cloudflare DNS
- Registrar: Update nameservers or A Record.
- Cloudflare: Edit A Record: 01. Name: @ or www. 02. Content: New host’s IP. 03. Proxy Status: “DNS Only”. 04. TTL: “Auto”.
- Wait 24-48 hours.
Step 3: Use the Tool
- SiteGround Migrator: Install plugin, generate token, and migrate.
- Bluehost: Use cPanel’s WP Migration tool with source credentials.
Step 4: Verify and Optimize
- Test the site.
- Reset permalinks.
- Monitor Search Console for crawl errors.
Pros: Free, host-specific, easy.
Cons: Limited to supported hosts.
Best For: Same-host migrations.
7 Must-Know Tips for a Perfect Migration
- Backup First: Use UpdraftPlus or All-in-One’s backup feature.
- Nameserver Timing: Update nameservers or Cloudflare DNS early.
- Disable Plugins: Deactivate security/cache plugins before migrating.
- Check Compatibility: New host must support WordPress 6.0+ and PHP 8.0+.
- Test Thoroughly: Check links, forms, and media.
- SEO Safety: Set up 301 redirects and submit sitemap (like your article’s tips).
- Monitor GSC: Watch for crawl errors in Google Search Console.
The Results: A Flawless WordPress Migration
I migrated a 400MB blog in 30 minutes using All-in-One WP Migration, with nameserver and Cloudflare DNS updates ensuring instant dashboard access.
Paid all-in-one unlimited extensions very good work for larger sites, while alternatives like Migrate Guru and manual methods worked for different needs. Screenshots make every step foolproof.
Final Words
Moving your WordPress site is easier than you think. All-in-One WP Migration’s free version rocks for small sites, while paid extensions tackle bigger ones.
Manual methods, Migrate Guru, or host tools are great backups. Update nameservers or Cloudflare DNS, follow these steps with visuals, and delete migration plugins after use.
Ready to move? Go crush it!
Related Articles about WordPress: